Good day, dear site visitor! This post will cover the Google Webmaster Dashboard - Google Search Console. Earlier, I already wrote about the same tool for webmasters from Yandex, you can read about it. After reading the article to the end, you will learn why and how to add a search console website, and also consider all the tools in the Google Webmaster Tools panel.
Why do you need Google Webmaster Tools?
By adding your site to Google Webmaster Tools, you can:
- analyze the search queries that bring users to your site from the issuance;
- view indexing statistics;
- receive notifications about robot crawling errors, security and indexing problems;
- find out which pages are poorly displayed on mobile devices;
- follow the link profile - external and internal links;
- add to console Google files Robots.txt and Sitemap.xml
- send requests for forced indexing of url.
How to add a site to Google Webmaster
Before registering a site in the Google Search Console, set up an email address at gmail.com. Instructions for creating Google mail is at the link
To sign in to Google Webmaster, follow the link https://www.google.com/webmasters/tools/home?hl=ru
On the page that opens, you will be prompted to confirm ownership of the site. We do everything according to the instructions:

In the process of writing instructions, I add my new site to Google Webmaster, so I don’t link to it. In the first paragraph, click on the link and save the file to your computer. Next, in a convenient way for you, upload it to the public_html site folder. I usually upload all files via . The program is not difficult to use. If you are more accustomed to the usual hosting panel, download through it. To check if you have uploaded the file there, follow the link in the second paragraph. If the page has opened and everything works, then click on the "Confirm" button.
With the addition of the site sorted out. Now consider the panel Google tools and its functionality.
Essential Tools for Webmasters in Google Search Console
More recently, Google Webmaster has changed the interface. The old version is also available, you can switch to it through the menu bar in the left column. The salient features of the new interface are as follows:
- the new Google Console is optimized for viewing on mobile devices;
- the period of traffic data analysis has been increased from 3 to 16 months;
- the report on external and internal links is on the same page.
Consider what functionality the Google Webmaster console has:

There are three graphs with reports on the main page: efficiency, coverage and improvements.
The Index section contains two items: Coverage and Sitemaps.
The Coverage section contains a report on the indexing of the site, errors encountered when crawled by the robot
Based on this data, you can find out about the number of indexed Internet pages, as well as what errors occurred when the search bot crawled the site.
The Remove URLs subsection is not available in the new interface. In it, you could leave a request to remove pages from the index, which got there by mistake and do not carry any benefit.
Scanning
In this section, you can see the errors and problems found by the Google crawler while crawling your site's pages. Let's consider each subsection in more detail:
- Scan errors. Here is a list of pages, as well as the reasons why the robot could not enter the page.
- Scan statistics for the last 90 days. Here you will see the number of scanned pages per day, the number of kilobytes downloaded and the time spent.
- View as Googlebot. You are given the opportunity to look at the page of the site through the "eyes" of the Google robot.
- Blocked URLs. It displays blocked page addresses in the robots.txt file. If you set the directive incorrectly, you will see it here.
- sitemaps. The Sitemap.xml file contains a list of articles posted on the site and it also states how often this or that page is updated. This instructs the search robot to crawl pages at a certain frequency. In Google WebMaset on the graph you can see the number of submitted and indexed pages. In my case, these values matched.
- URL parameters. Here you can follow the duplicates on the site. I have added the following parameter - replytocom. He is responsible for replying to comments.
The article turned out to be very long, but it covers all the tools and reports of the Google Webmasters Panel (Google Search Console). I hope you find useful information for yourself.
Unfortunately, the analogue of Yandex Webmaster in Google is not as functional as Yandex Webmaster. I would like to believe that it will be finalized in the near future.
Due to the express panel, the user gets quick access to those sites that he visits most often. All browsers today are equipped with this option. However, they are not developed in all of them.
Panel Features for Google Chrome
Express panel in Google Chrome has some limitations. Below the search bar, there are only eight tiles with thumbnails of web pages created based on your visits (the more you visit, the more likely the site will appear there). Adding tiles using browser tools will not work - you will have to install extensions.
Another disadvantage of the express panel in Google is that it disappears if you delete your browsing history.
Replacing the express panel
You can also save pages in the bookmarks bar, so it can be considered a kind of alternative. The advantage is that here you have the right to choose what will be shown and what is not. How to enable it?
1.Open the menu by clicking on the icon with three stripes and select "Settings".
2. In the "Appearance" block, check the "Always show the bookmarks bar" item. Now an additional line will appear under the navigation bar, in which the links you save will be placed in the future.

3. To add an address, go to the site and click on the star icon. Check the "Bookmarks Bar" option in the drop-down menu. The bookmark will be immediately added to the top of the browser.

The number of bookmarks is unlimited. Since not all bookmarks can fit on a line, only eight bookmarks will be visible. You will need to click on the arrow located to the right of the line to open the entire list of saved pages.

Panel from the Yandex browser
Those who are used to having freedom of action will choose this option for Google Chrome. The extension is available in the browser store itself. How to get there?
1.Enter the address: chrome://extensions/.

2. Go down to the end of the page and click on the inscription "More extensions". You will be taken to a directory.
3.Find the Visual Bookmarks extension in the store. It is necessary "Yandex Elements".

4.Click on "Install".
After successful installation, restart your browser and after opening you will see that the new express panel can already be used. It is logical that the search string will no longer be Google, but Yandex.
The tab bar can be customized. To do this, just click on the "Settings" button, which is located at the bottom right.

Select the required number of bookmarks. It can be reduced or increased - it all depends on your desire. The maximum number of cells is 48. You can also decide on the background image of the browser start page: choose from the available options or upload your own. Check the box to the left of "Show bookmarks bar" if needed.

If you want to delete a bookmark, click on the cross in the upper right corner of the site thumbnail cell.
Help from Speed Dial 2
This is a worthy alternative to the Yandex express panel, but from another developer. It can also be installed through the online extension store.
1.Go to the extension store in the way described above.
2.Enter Speed Dial 2 into the search bar to quickly find the add-on among numerous applications.
3. Click on "Free" or "Install".

4.Since the extension to be installed needs confirmation, click on "Add". Then, after a while, a notification will appear that Speed Dial 2 has been added.

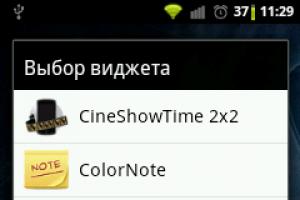
5.The following notification will pop up in a new tab:

6.Click on "Continue" to review the options or "Skip Welcome". You can register for the service, but this is optional.
7. The empty Quick Access Toolbar looks like this:

The user has yet to create his taskbar.
8. To add a page, click on the plus and write the address. Next, click on "Save".
In this express panel, to delete a bookmark, right-click on the cell and select "Delete" from the context menu.
To delete the entire table with windows, you need to go to the list of extensions and simply disable the Speed Dial 2 add-on by moving it to the “Off” mark.
IOS7 New Tab Page: iOS imitation
Here, instead of cells with a page image, widgets appear - an imitation of the iOS system. The application offers its own set of widgets with services. For the most part, English-language resources are located on the panel, so this is an extension for Google Chrome.

You can remove the site widget by holding it. Only here you need to use not your finger, but the left mouse button. A cross will pop up, an icon that will mean deletion. With a simple drag and drop, you can change bookmarks in places.

A couple more benefits:
- Virtual desktops, where icons of selected sites are distributed by topic.
- Static shortcuts at the bottom of the window. They do not flip when moving from one desktop to another. Among the fixed there is also a Google site. The most visited pages are saved here. However, they can be changed.
How can be configured? To change the appearance of the express panel, go to the Settings section (gear icon in the lower right corner).
In the window, you can put the desired background, add a bookmark (for this you need to enter the address manually). You can also import settings.

One of the shortcomings is the bad quality of the widget picture. This is due to the fact that the extension cannot always find a picture for the icon.

What if the panel disappeared?
Sometimes users complain that the panel with visual bookmarks is gone. Why is this happening?
There are two options: either this is a failure in the operation of the extension itself, or you went to another account Google under which the extension is not installed. To get started, go to the account on which the add-on was installed. If the account has not changed, then remove the extension and install it again. The problem must be solved.
Each user has the right to make an express panel in his Google Chrome. In particular, various extensions are used for this. The result is a beautiful and user-friendly interface of the program.
Google is one of the most popular and convenient search engines, which is increasingly preferred by users. But it is also a huge company that develops various services and applications for the most comfortable and enjoyable use of the Internet. One of the first developments (after Search, Directory and, of course, AdWords) was the Google Toolbar.
The program was created and offered for installation in the most popular at that time (2000). This was convenient for users, because there was no built-in search in IE, and beneficial for the creators, as it was a great way to promote a new add-on. A lot of time has passed since then and, of course, significant changes have taken place in the panel.
Among the most popular components that the Google Toolbar contains are the built-in search on the site page, automatic content translation, suggestions for incorrectly entered addresses, spell check, and others. These tools are really useful and greatly facilitate the work of the user. Over time, some of them have been built into IE. In general, this browser was the only one in which Google search was not by default. That is why Google Toolbar was the most important addition for it.
Some wonder if there is such a Google Toolbar for Opera. No, a special version was developed (apart from IE) only for FireFox, but its development stopped back in 2011. In addition, today the company fully supports and promotes Chrome, which, according to the results of the research, is the most popular. In this regard, Google is currently simply maintained in working mode, but not updated.

Now all Google Toolbar features are built into Chrome. If you use this browser, then all the necessary tools are in it. However, if you still decide to install the Google Toolbar in IE, then you should familiarize yourself with its capabilities in more detail. Here's what it includes:
- Live search - when you enter a word, you see suggestions in the form of the most popular queries (starting with the corresponding letters) that users are searching for. Thus, you do not have to write the whole word/phrase.
- which can be opened from any computer (saved in your account).
- Translation (mouse hover or automatically the entire page).
- Spell check - errors are highlighted in red, and when you hover over the correct version is shown.
- Autocomplete - eliminates the need to enter your name, login, phone number, and so on every time.
- Button "+1" - allows you to share useful and interesting information with friends.
- Google+ notifications (when a new message arrives, the corresponding button is highlighted in red).
- Settings that allow you to edit the Google Toolbar (remove or add tools, button labels, etc.).

In general, this add-on is quite convenient and useful. However, today many people use Chrome browser, which already contains all these settings. And secondly, the minimalist design of other services does not go well with such a panel, which looks rather cumbersome, not very modern and sometimes slows down the work.
 Hello everyone Recently, I installed the Avast antivirus, and it turned out to be buggy, some jambs, then with the process, then with, in general, the gembel is still the same. But maybe only me
So. You install Avast, well, or other software, and this panel from Google is also installed with it. There is nothing terrible in it, just annoying a little that it is put on the sly. It is needed to somehow make our search on the Internet better. But in reality it is often useless.
Of course, you can do without this panel, especially since it is installed only in internet explorer which not many people use.
When installing software, it is better to look a little more carefully at all sorts of checkmarks. That's when I put Avast, I did not notice this checkbox:

Well, this is understandable. They specifically make it so that it is difficult to notice. If you go to the properties of Internet Explorer, then on the Programs tab, click on Manage Add-ons, that there is a Google Toolbar in the list of tools (there is also some Helper):

There you can disable it by the way - just click on it and then there will be a Disable button. But I think it's better to remove it if you don't need it. But first, take a look at what she looks like. So I open Internet Explorer and here it sits at the top:

The panel has the following menus, if you click on Search:

And here is the menu that will appear if you click on the Advanced button:

So you see, there is still something useful to be found here.
If you click on the last button, you will see such a menu, in which there is even a Settings item:

It became interesting, what kind of settings are these, in general, I opened them and was a little stunned, because they are decent here as for the panel:

So you can dig into them, maybe you will find something interesting for yourself. As for me, this Google Toolbar might be useful, but that's just it for Internet Explorer. Even I don't use it. Not that it's a bad browser, no. I just got used to Mozilla
How to remove Google Toolbar from computer completely?
Well, they decided to delete it, then I understand you, apparently you did not like this panel and did not please you. Then I agree. It is necessary to remove everything that is superfluous from the computer so that there are fewer unnecessary programs.
To uninstall, open Start and click on Control Panel:

In this heap of icons we find and launch Programs and Features:

Then we find this Google program Toolbar for Internet Explorer and right-click on it, then select Delete:

That's it, then this panel will be removed quickly and the Internet Explorer browser will open with a page where it will be written like this and that, tell us why you removed this panel:

Here you can specify, or you can close the window and that's it. It's a trifle anyway 06/14/2016
Google Chrome Express Panel is a convenient and practical tool that allows you to get quick access to the most visited sites. But sometimes this is not enough, in this area you need to place visual bookmarks. About the possibilities and methods of transforming Google later in the article.
Google Chrome Express Panel
All Google Chrome users have long appreciated the convenience and simplicity of the express panel tool, which is located in the central part of the screen when opening a new tab. The presented element is formed automatically, based on the number of visits to a particular resource. It is almost impossible to influence the displayed information. The only feature available is to remove some sites from the external view.
To turn a regular panel into a universal one with the necessary tabs, you can do it in several ways:
- The first option is associated with downloading standard browser extensions. At the moment, the online application store has several worthy products that fully satisfy the needs of customers. All of them are free and ready to jump. Before installation, we recommend that you read user reviews, track the rating;
- The second method is more universal, suitable not only for Google Chrome, but also for other browsers. It communicates with the use of over-browser applications. Among the most famous, the product from Yandex and Mail stands out. Visual bookmarks in this case open from a new side.
Let's consider in more detail the first option, how to install and configure it.
Standard extensions for Google Chrome

The easiest and most convenient way to transform the express panel is to use additional extensions. At the moment, the Google online store has several options that are available for download. Each solution has slightly different functionalities. Regardless of the selected software, installation and configuration is performed according to the following algorithm:
- Find the application, open its main page. In the new window, find the install button and complete the installation;
- After the operation, you will need to restart the browser. Next, we carry out activation by clicking on the program icon in the upper right corner;
- All additional settings and features are implemented at the place of activation of the extension.
The program is installed, so you can enjoy simpler and more convenient functionality. It should be noted that they do not always have an attractive appearance, this can be corrected by an alternative implementation of the visualization.
Alternative bookmark visualization options

You can transform the express panel using special independent programs from Yandex, Mail, and some other providers. The software is installed on top of the browser, and is a separate application. Ease of installation, beautiful external design and additional functions represent a more complex and interesting solution to the problem. To install such a product, you will need to perform the following steps:
- Download from the official site desired program. We recommend that you do not download the application from unreliable sources, as viruses can often be found in such software;
- Perform basic unzipping of the software, we recommend that you uncheck some items, in particular, the implementation of Yandex Bar or other elements that are not in demand;
- Launch the browser, adjust some settings, including search system default. Enjoy the new features of visual bookmarks.
Each of the methods presented above are effective and worthy of consideration. Which one to choose, everyone decides for himself. The main thing is your convenience and enjoyment of being on the Internet.